
I’ve been so excited by this project, from planning to implementing to watching it evolve and grow, but for some reason I have been putting off doing a post about it. It has been in nearly 4 weeks now, so at least there will be some progress pictures.
I guess the first thing to address is ‘what is a food forest’? I get asked that question a lot and take for granted what I know now. There are so many different explanations and interpretations of a food forest. In our context, it’s a way of growing food, designed to be an ecosystem that mimics nature. It is a system that will essentially grow our fruit and nut trees, supported by predominately edible plants that serve multiple functions. For anyone interested to know more about food forests, there is a wealth of information on the internet that I just won’t do justice to. I’ll keep this more a personal story about our journey.
We used a permaculture consultant for our design and implementation. While we understand the basic concept, the idea of the practical implementation was a little daunting and overwhelming. Last year, I attended a food forest design, hands on workshop (with 11 month old Ruby in tow) with Doreen from Bloomsfield Homestead in Jimboomba. We engaged Doreen to come out for a consult at our place and when the time came to finally implement, we had no hesitation to use her services.
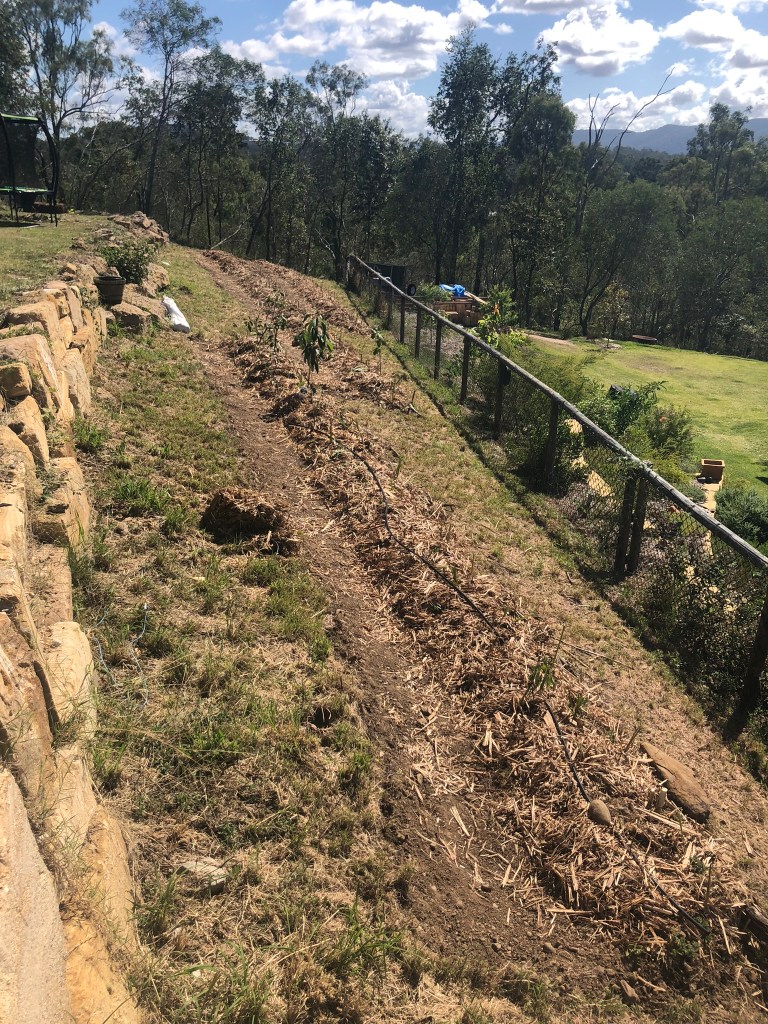
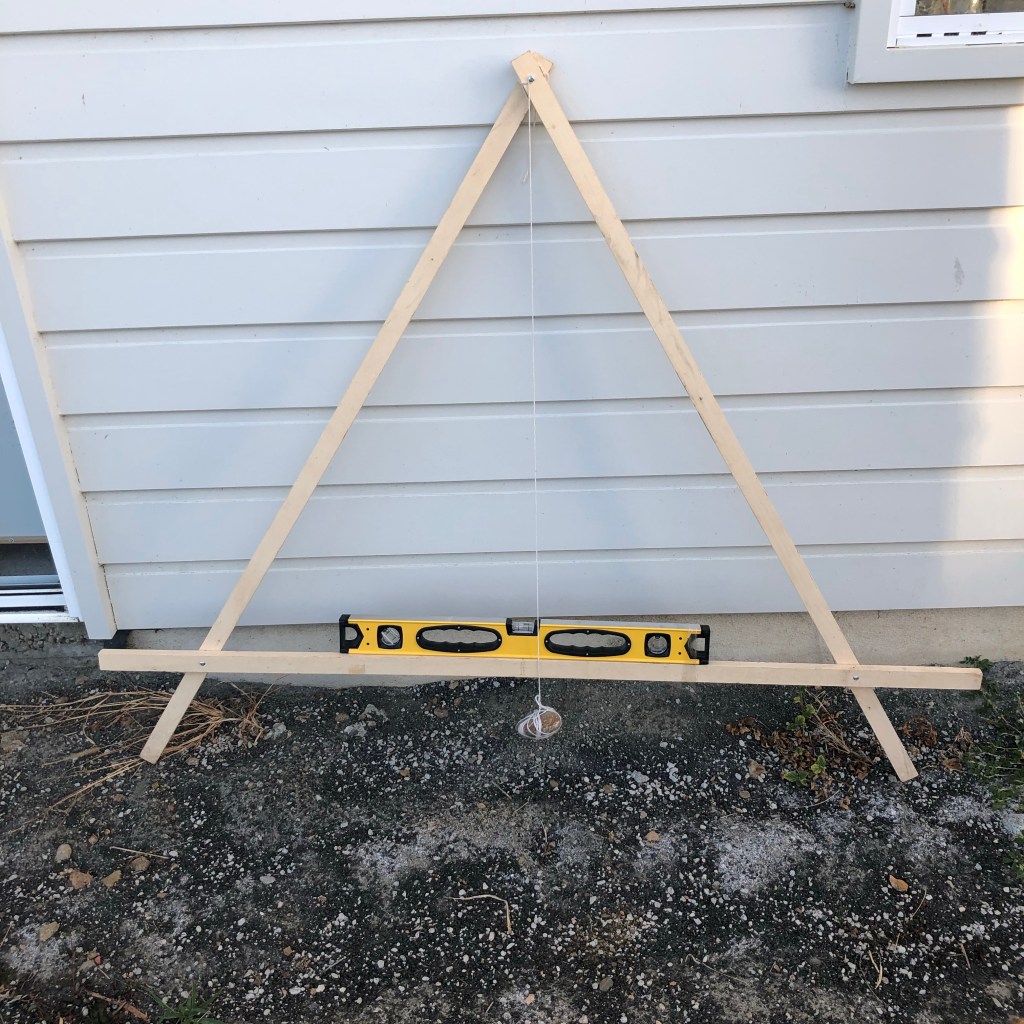
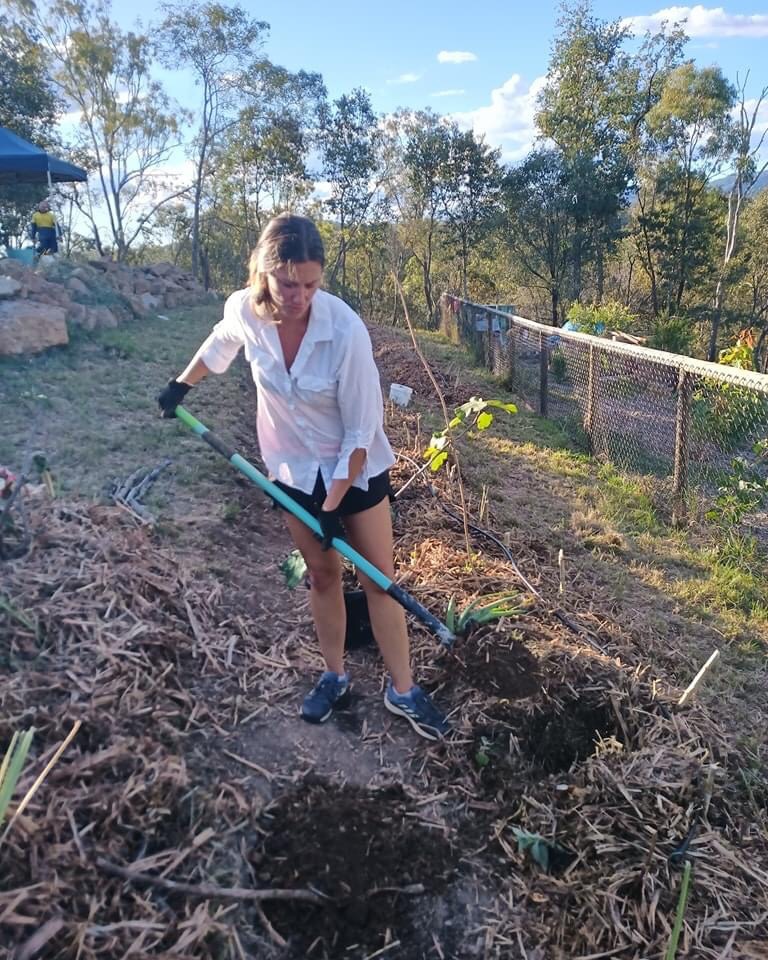
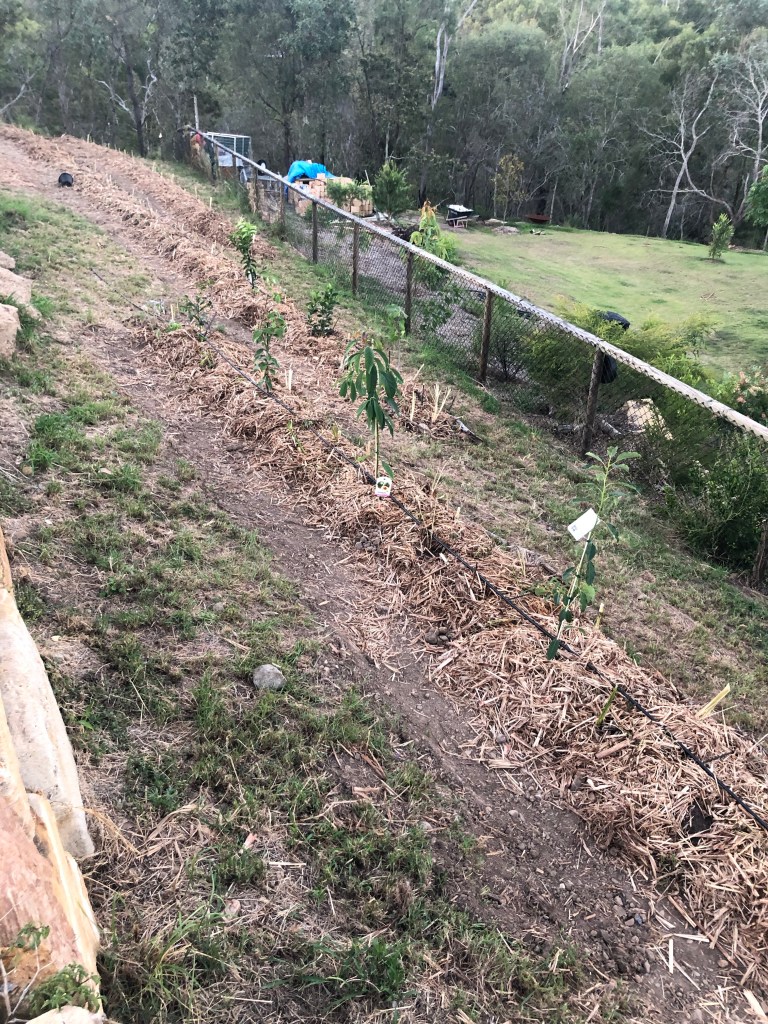
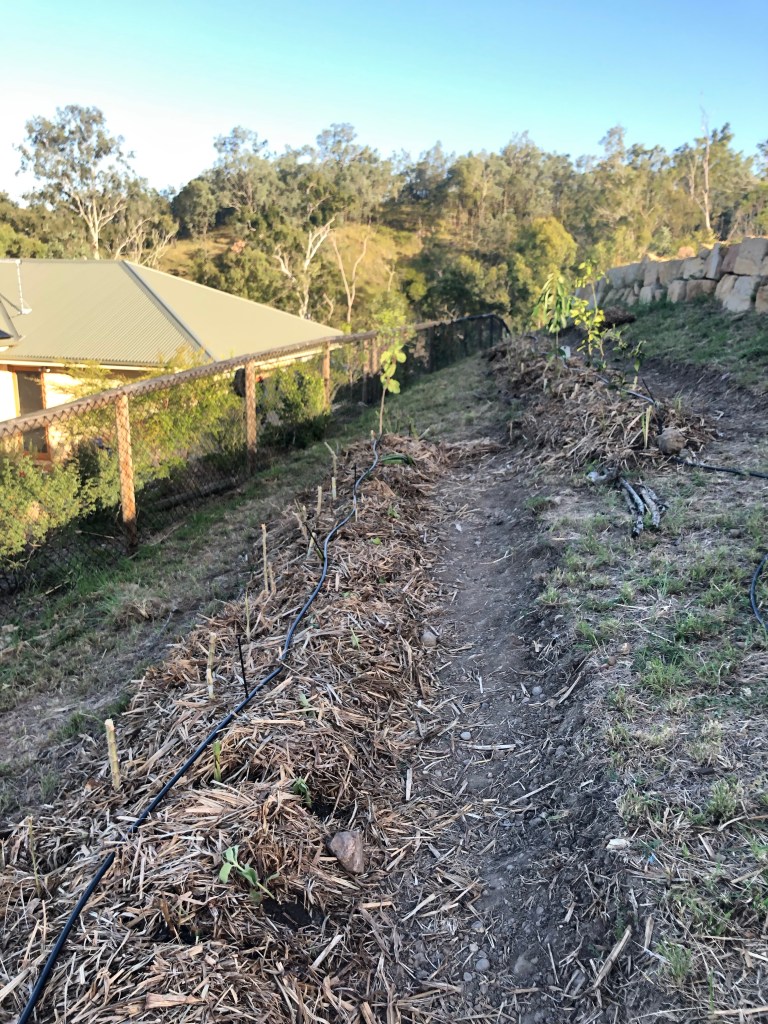
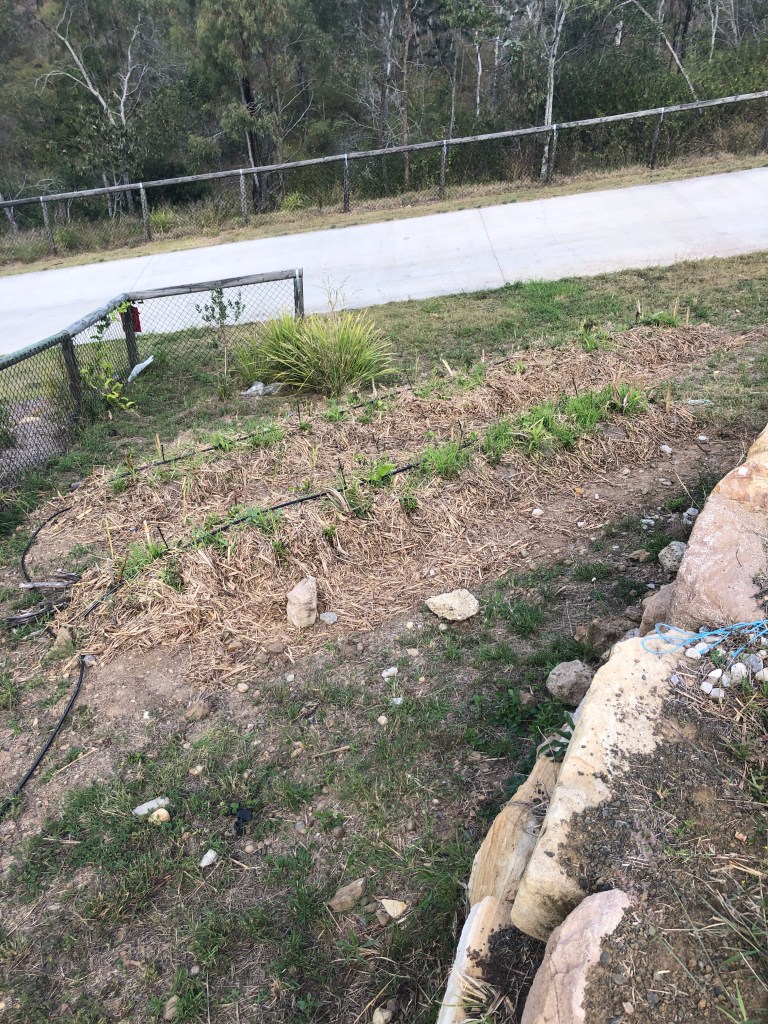
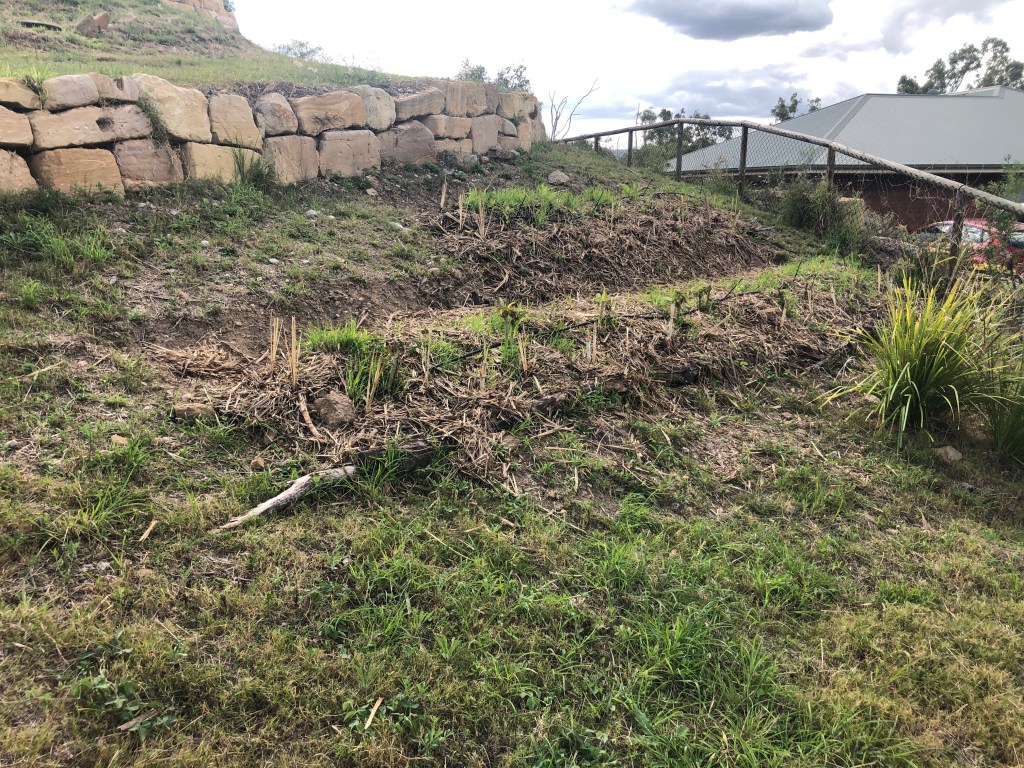
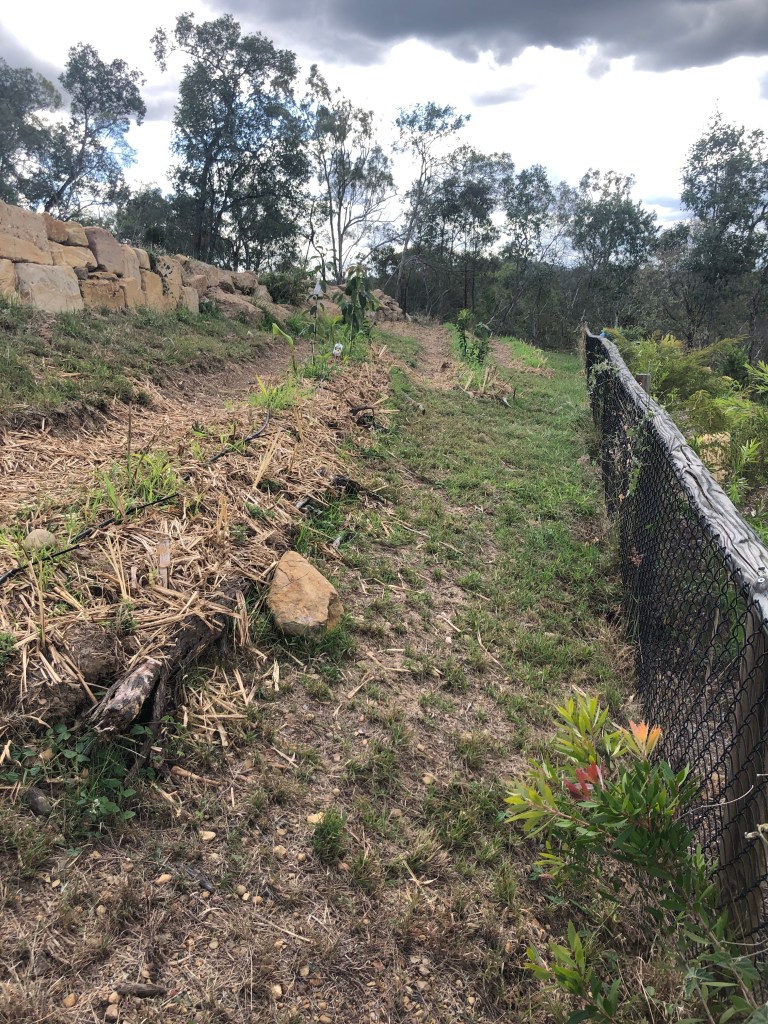
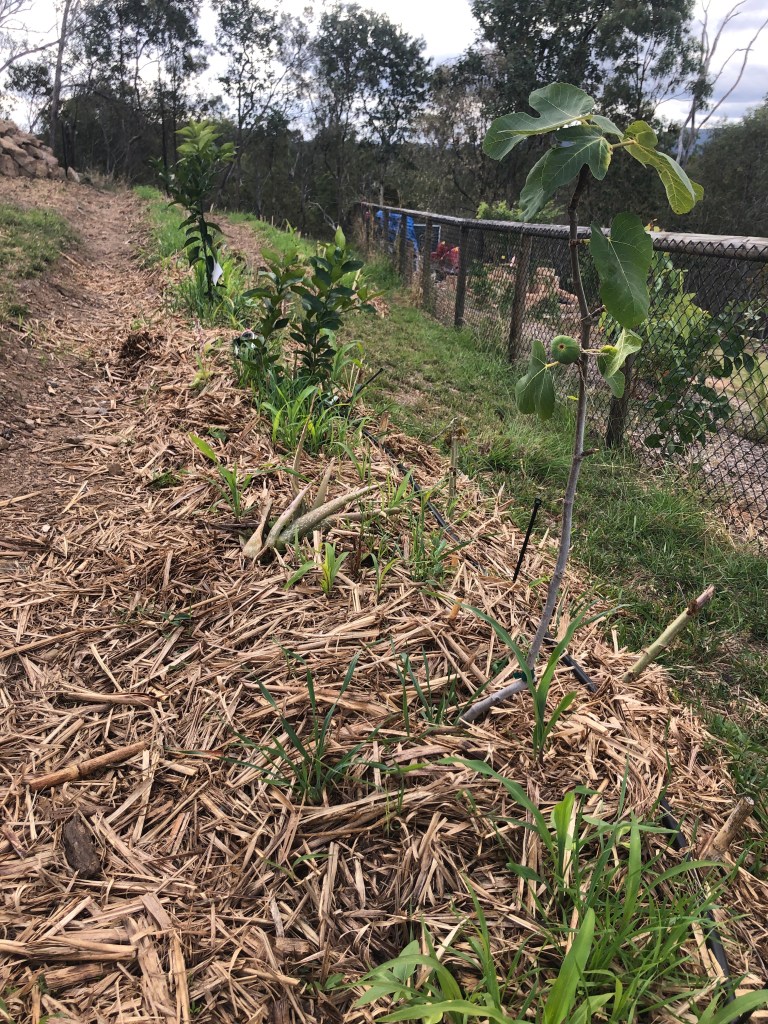
Doreen recommended using out north east facing slope as the site. It was essentially a forgotten and unusable area of our block, a slope at the boundary, at the bottom of a retaining wall, that ran 50m+. It was just grass, weed and rock; a pain to whipper snip and manage. The original plan was to create swales on contour to harvest rainwater and create the planting area. Due to the rock and poor soil (or lack of soil), we did a combination of swales and contour beds. Louis made an A frame, and marked out the contours, which he then dug by hand with a mattock. He also dragged up organic matter, tree logs, branches and sticks from our environmental zone, up the hill to make the contour beds. Some serious hours and effort of manual labour! I will add, I did pick up the mattock and ‘help’ when Louis’s shoulders were nearly done. This means I get to say I helped dig the swales 😉
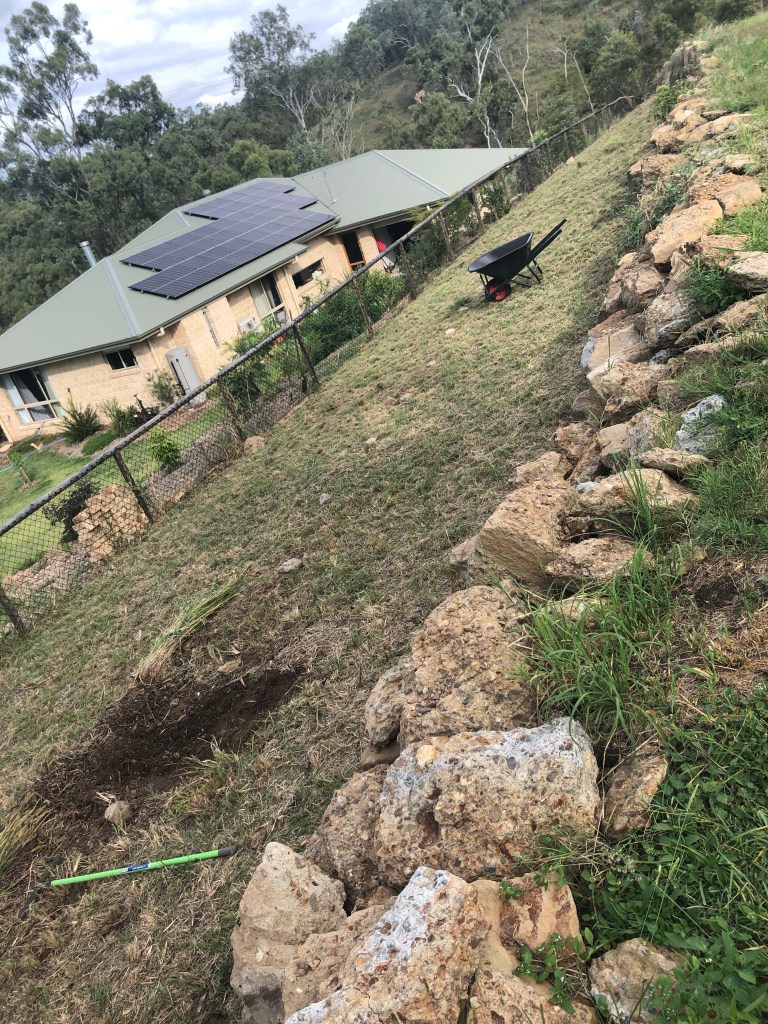


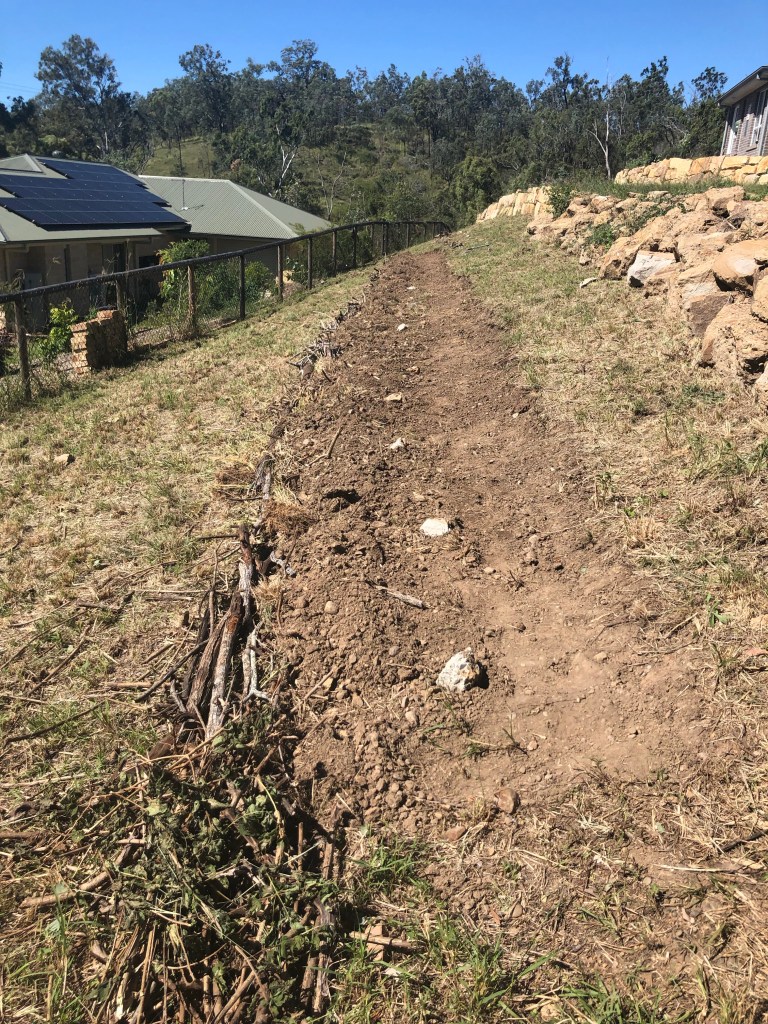
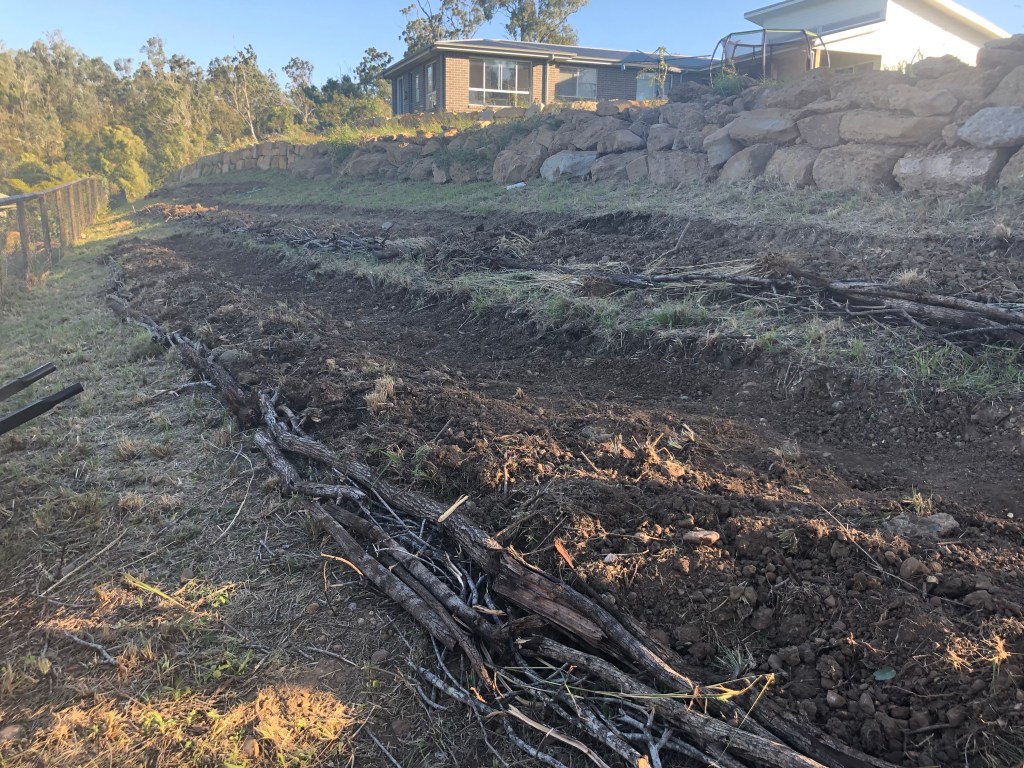
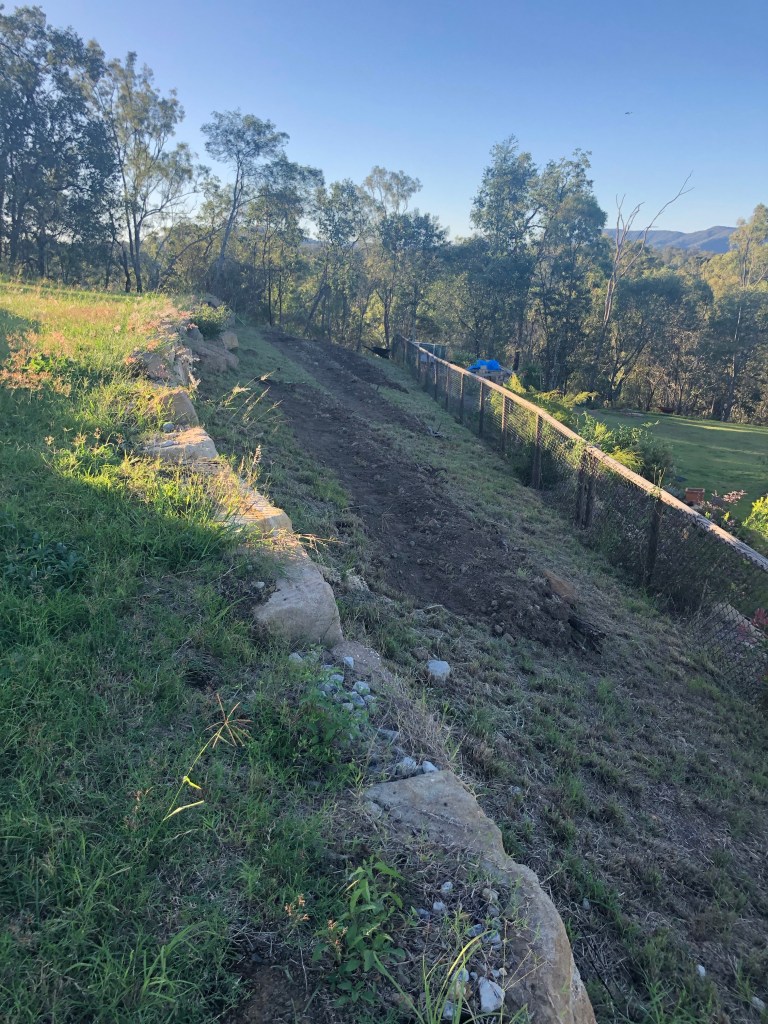
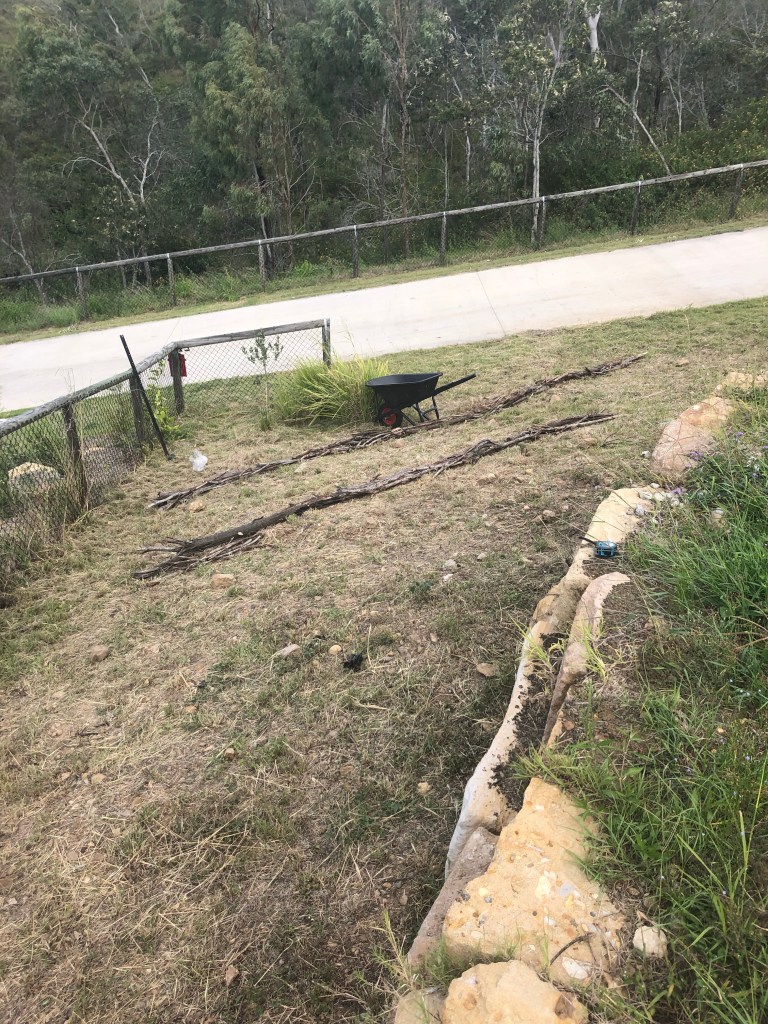
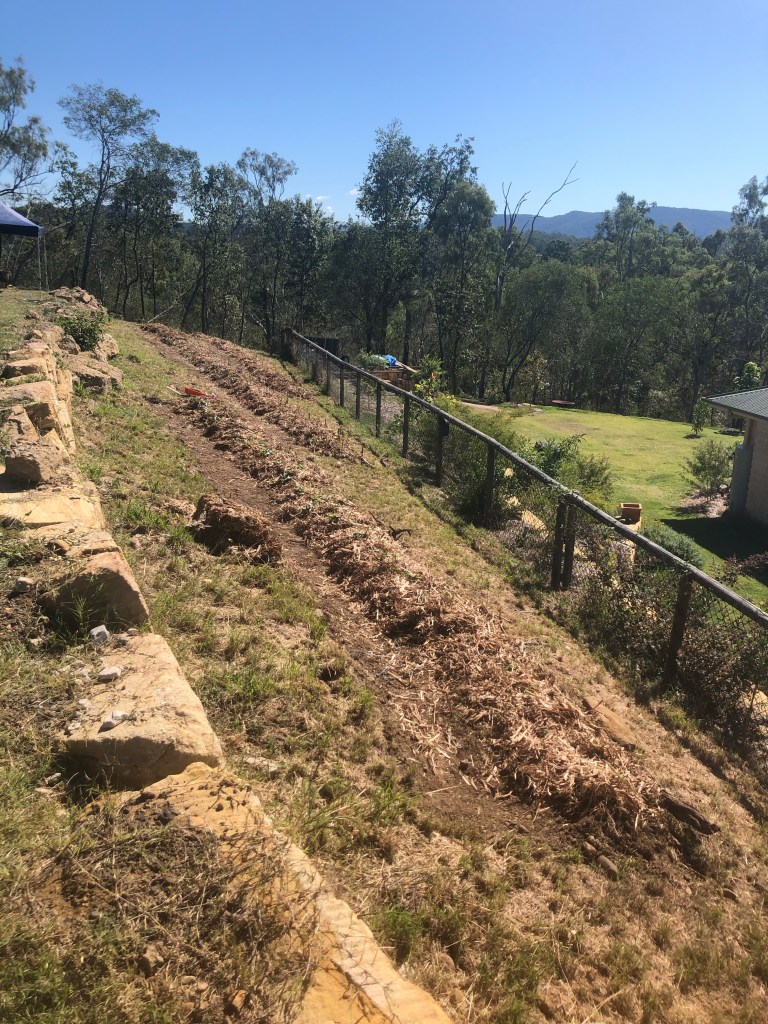
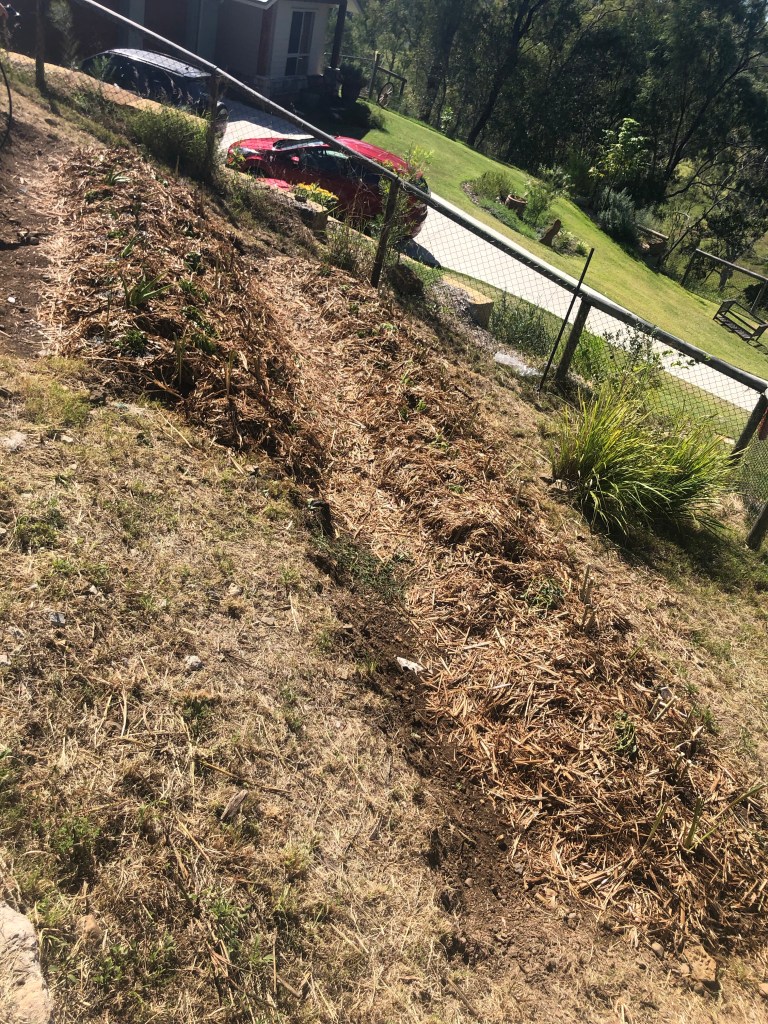
The final result was 68m of contour beds/swales over 5 beds. The logs/branches make the edge of the beds, and the dirt dug up out of the swales piled down the slope against the logs to make the beds. All approx. 80cm wide. This was all done before the install day with Doreen.
Day of the install
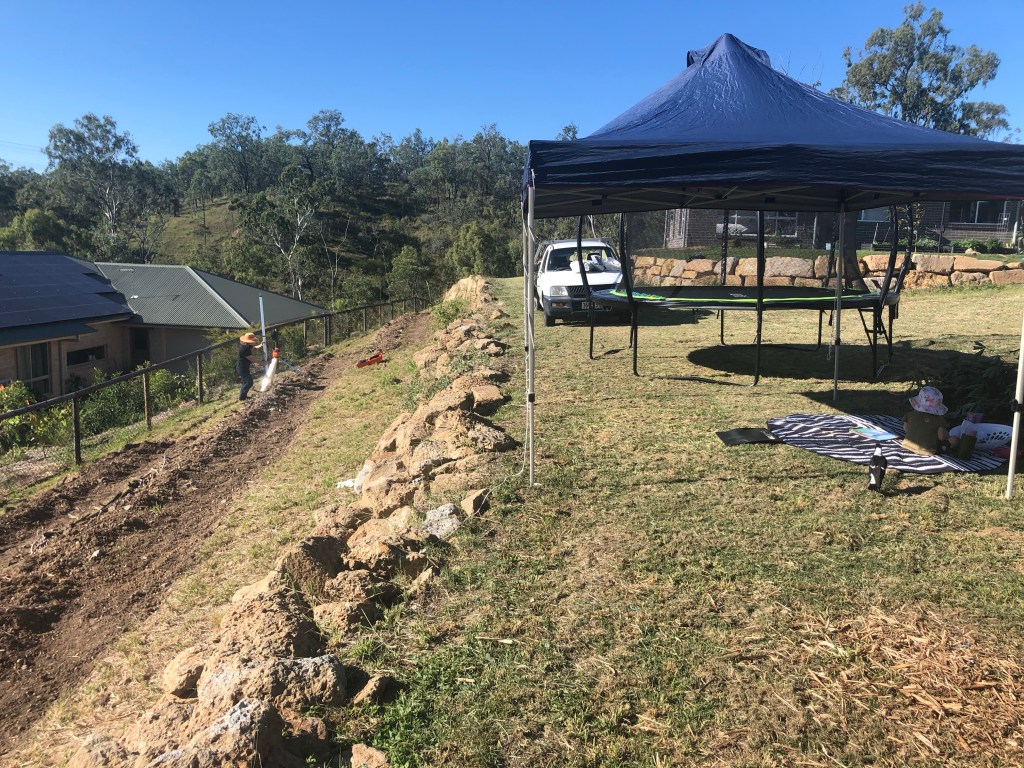
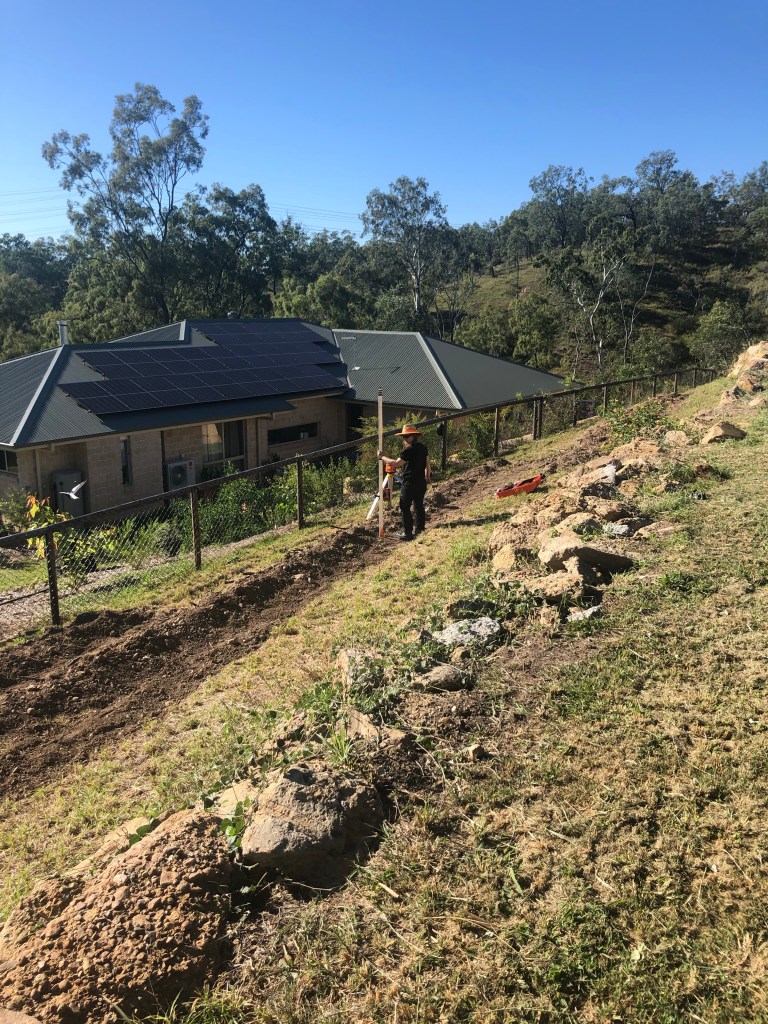
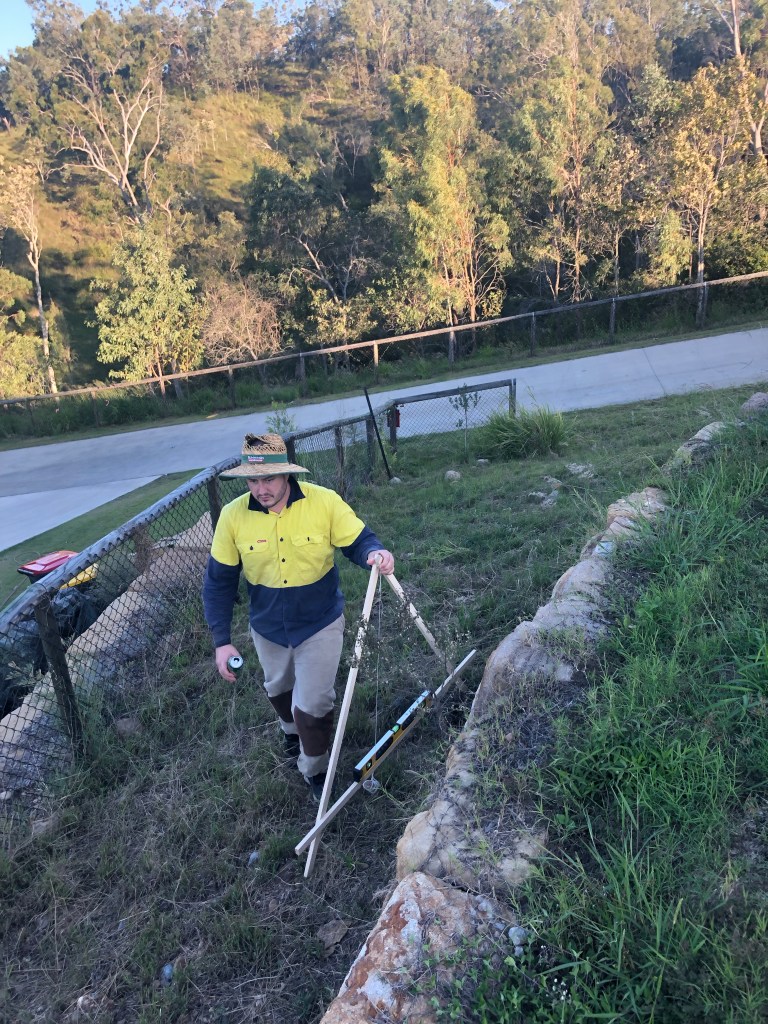
Doreen checking all the contours with her laser level. Surprisingly, only a few little tweaks required.
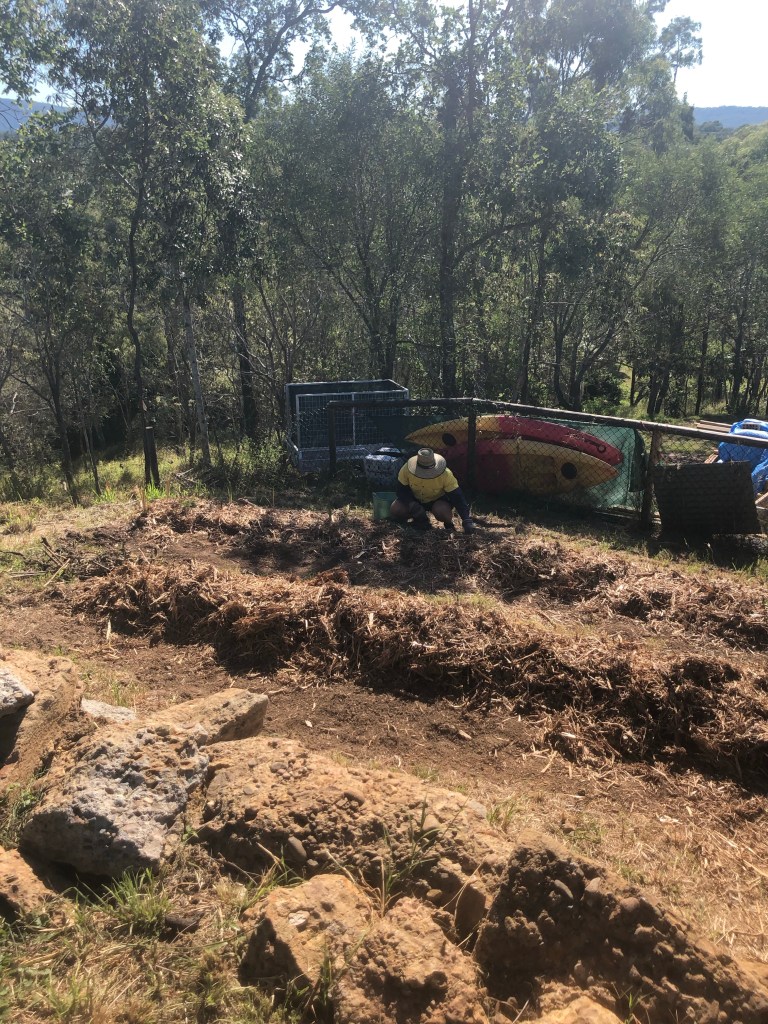
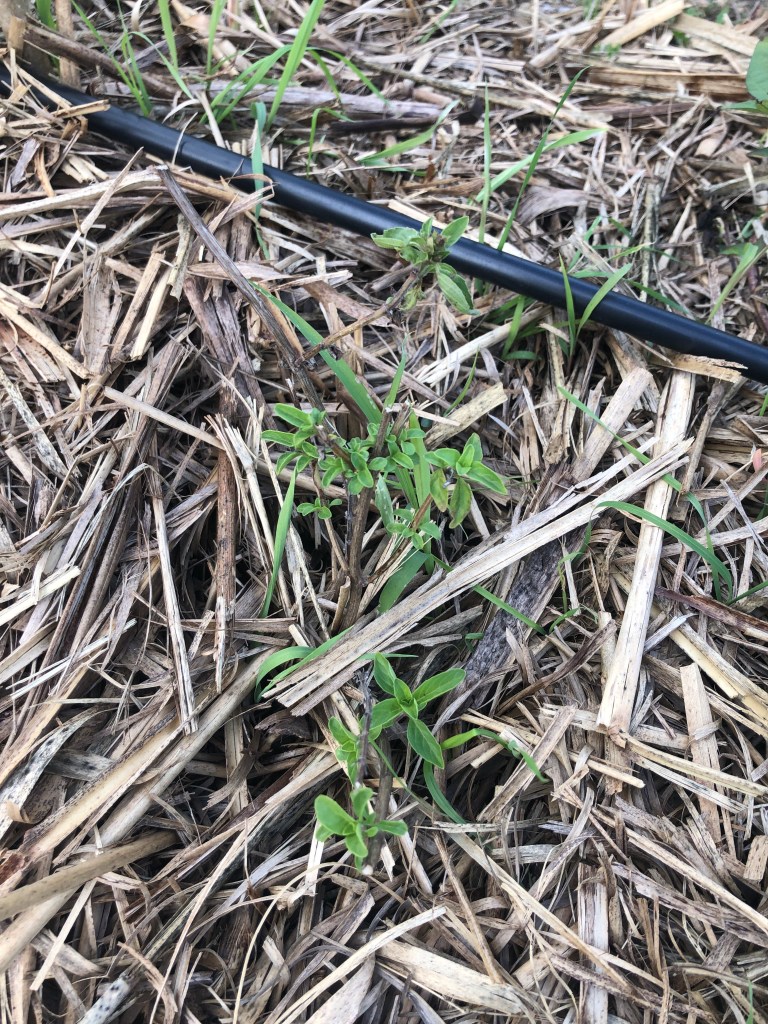
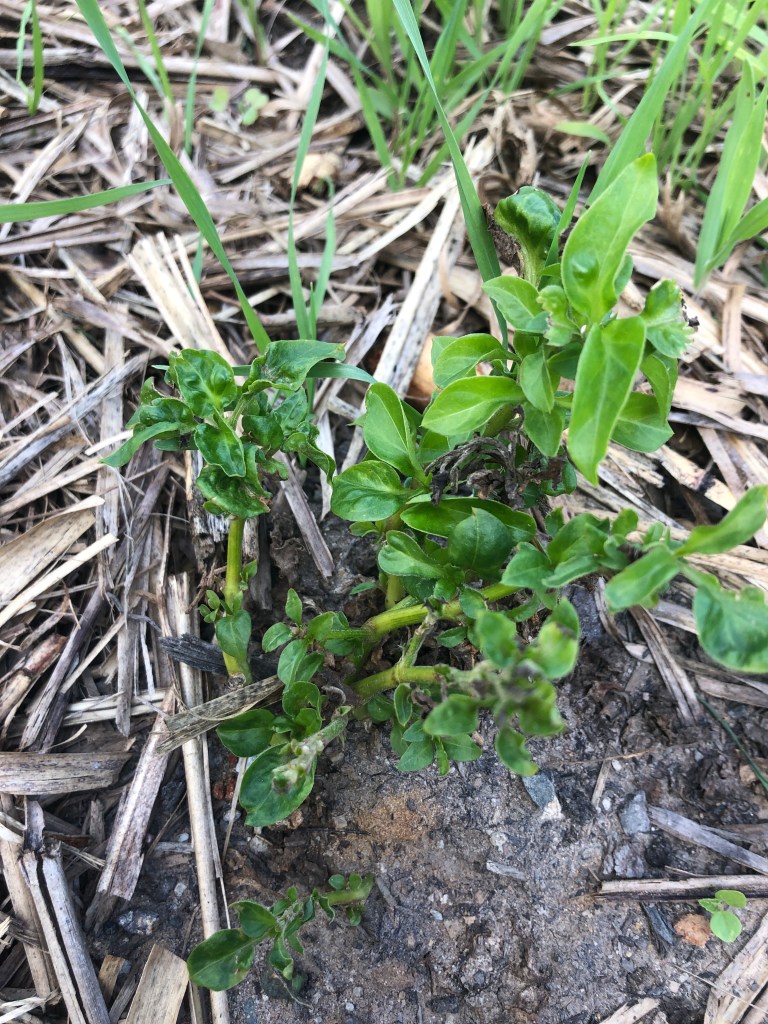
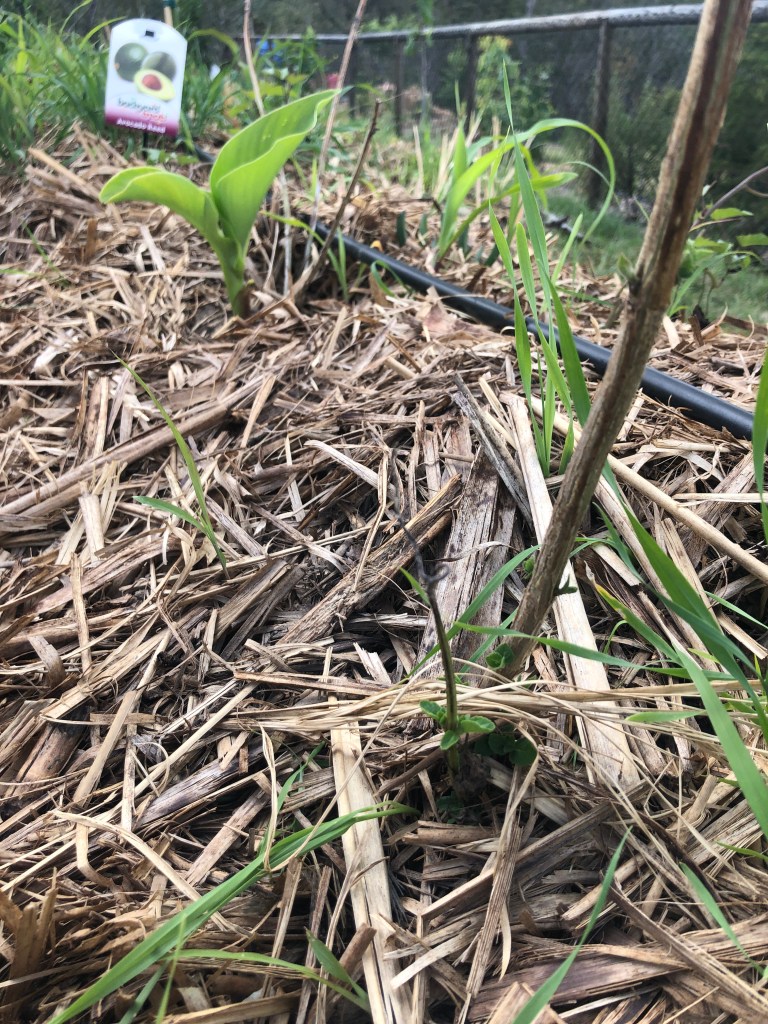
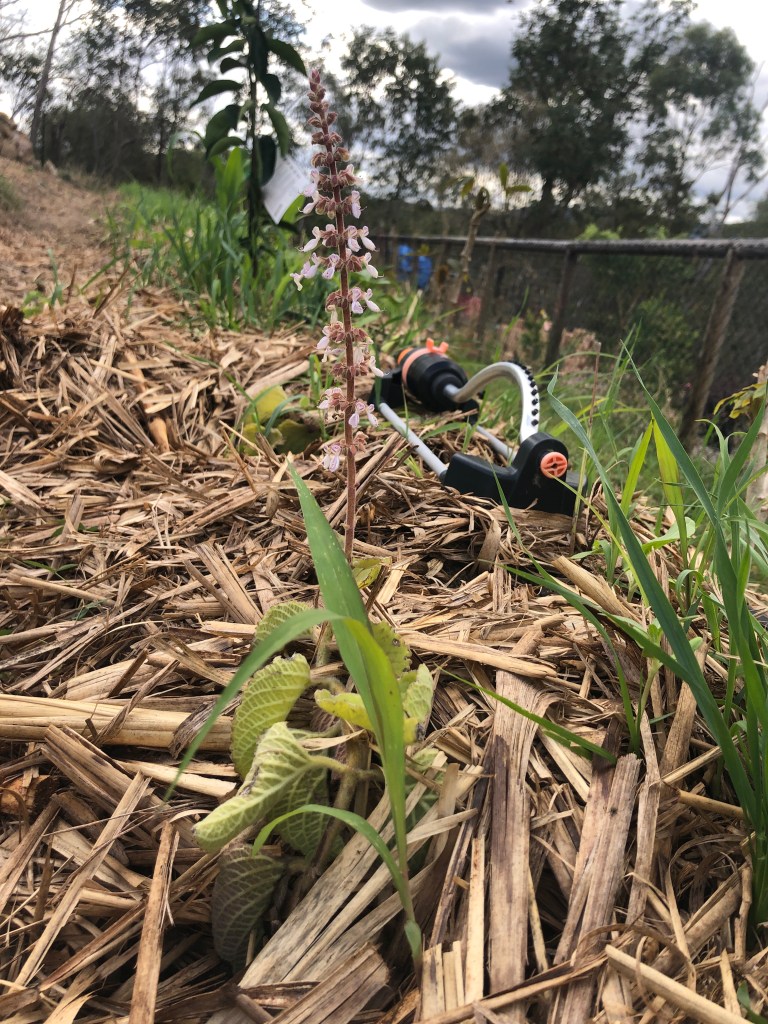
We started by laying seed for a cover crop/green manure then scatter mulching with sugar cane mulch. Then we pocket planted the support plants, all supplied by Doreen as part of the package. We just used garden soil from our local landscaping yard for this. Doreen laid out all the plants, hundreds of them, each serving one or more purpose. I don’t have the whole list, but a few I can think of off the top of my head.
- Popcorn Cassia – planted as seed. Fast growing and will act as shade and wind protection for young fruit trees trying to establish in our harsh elements. Idea is for them to be cut down in 3-4 years when their purpose has been achieved and used to feed the remaining trees. They also act as nitrogen fixers, which will be put back into the ground. Flowers attract pollinators.
- Pigeon pea – also planted from seed, offer protection for young fruit trees, has a 3-4 year life span. Nitrogen fixing, so great mulch at the end of its life. Apparently it’s great fodder for animals, but that’s not relevant for us at this stage. The peas are also edible for us.
- Bana grass – fast growing, used as wind break and biomass for regular chop and drop
- Vetiver grass – stability and erosion control, used on the ends of the beds and along the bottom edge. Great for slowing and spreading run off water and stopping soil erosion.
- Lemongrass
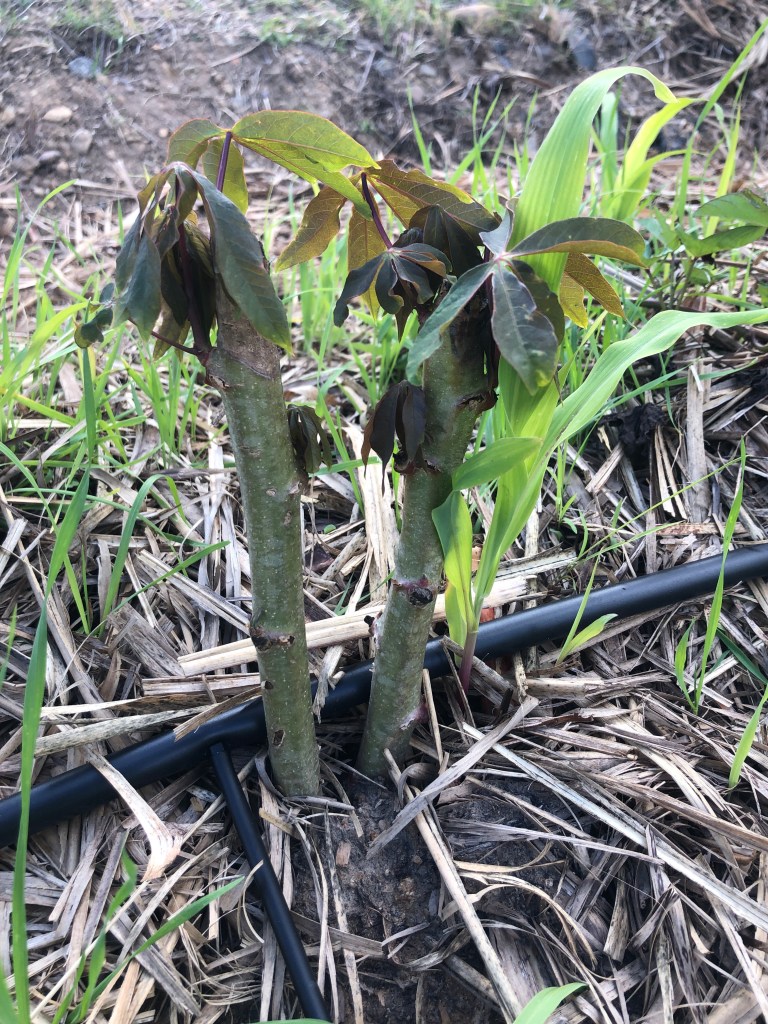
- Cassava
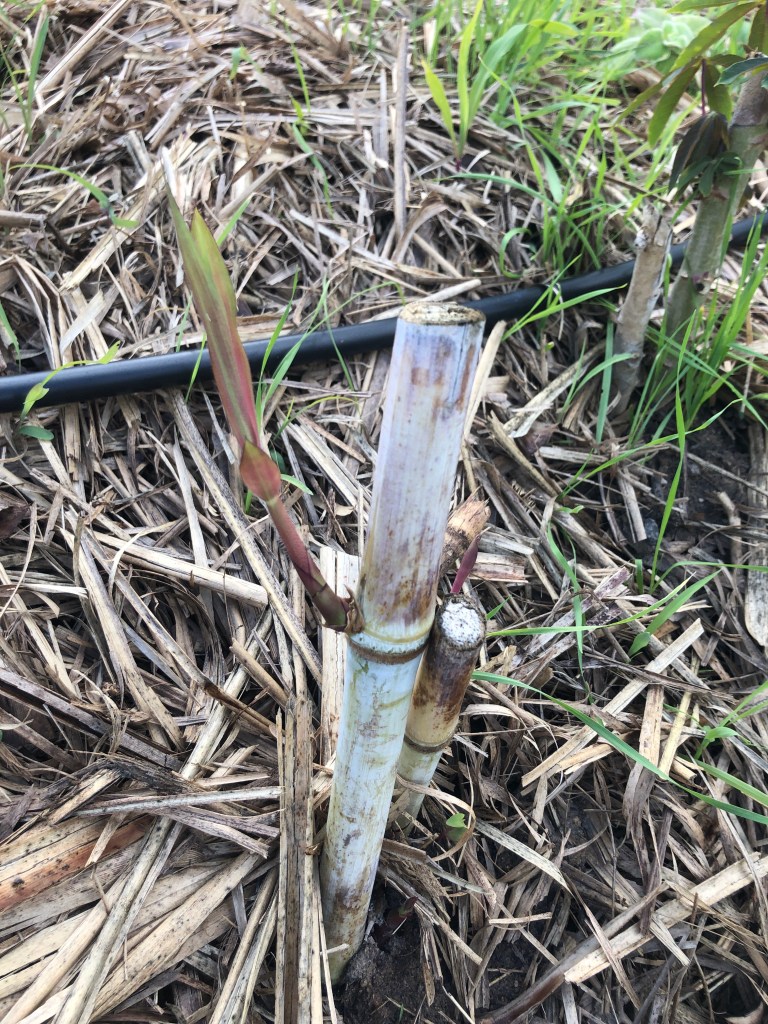
- Arrowroot
- Dog bane
- Mugwort
- Lemon scented geranium
- Mother of all herb
- Longevity spinach
- Brazilian spinach
- Tulsi
- Pigface
- Dianella
All serving functions of biomass, ground cover, levels and layers of the forest system, while supplying food.
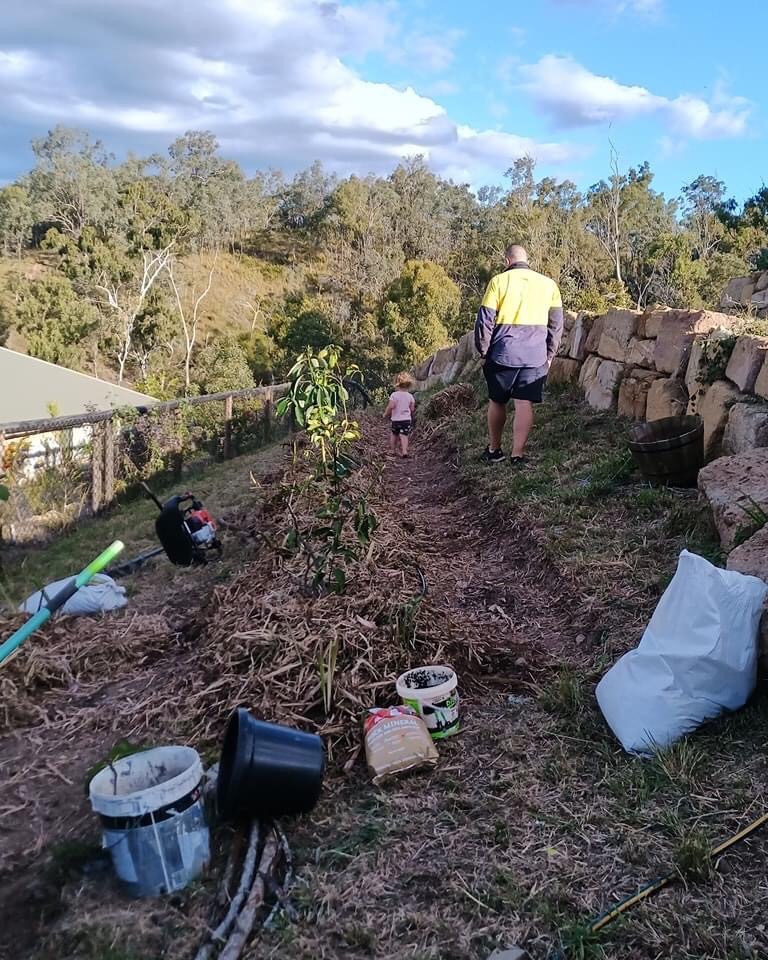
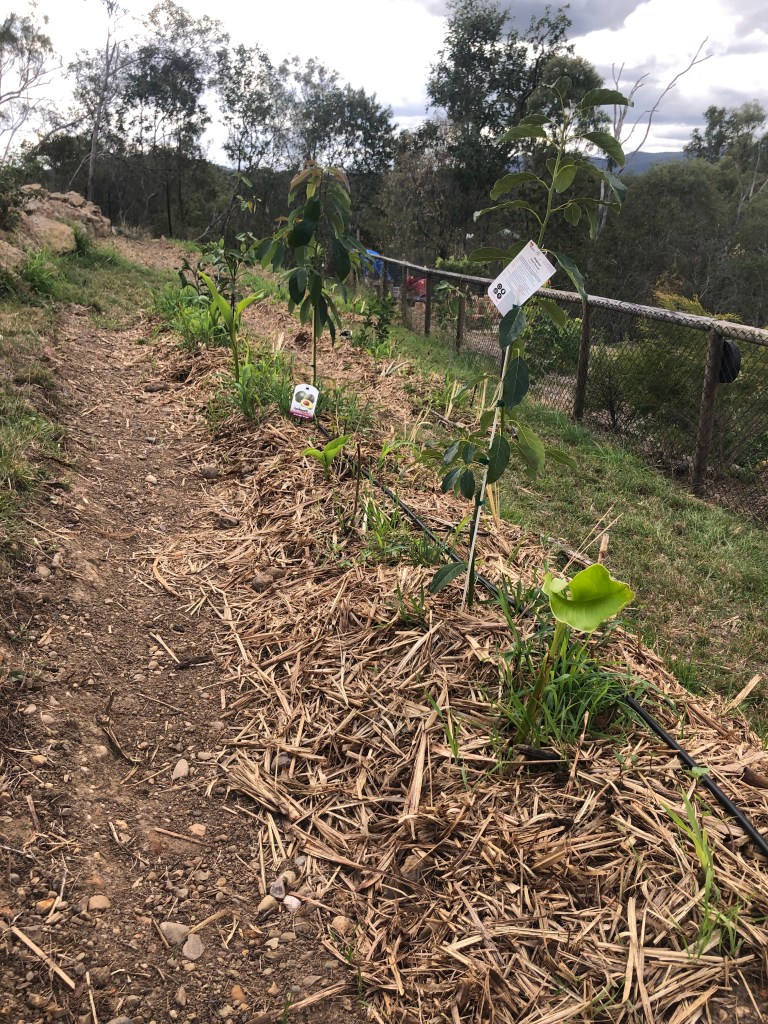
We also planted the fruit trees we had, an avocado (Reed), lemon, Ruby grapefruit and fig while Doreen was with us to guide us through the process. The next day we added another avocado (Dwarf Pinkerton), Tahitian Lime and Ellendale Mandarin. Both the avocados are type A, and we will be putting in at least 2 more that are type B flowering for cross pollination. The plan is to extend our avocado harvest for as much of the year as possible with the different varieties. We also plan to keep them pruned to a manageable height! We have the space for nearly 25 more trees, which seems like a lot, but isn’t really by the time we add 2 of each of the trees that need cross pollinating. I have a huge list of things I want to grow, then multiple varieties within each of them, to both extend the harvest time and for my own preferences.
I’ve got my wish list, and am prioritizing things that take longer to establish or fruit. As we are coming into winter, I’m now looking at deciduous trees, and potentially bare root stock. I’ll then have my list for Spring ready! I hope to have all the trees in over the next year.
A few little extra things, we are still working out our best options for the grass surrounding the beds. We don’t want to be maintaining grass down there still. We’re looking at different ground cover options for now. We are just being mindful of leaving space for accessibility around the beds and along the boundary fence.
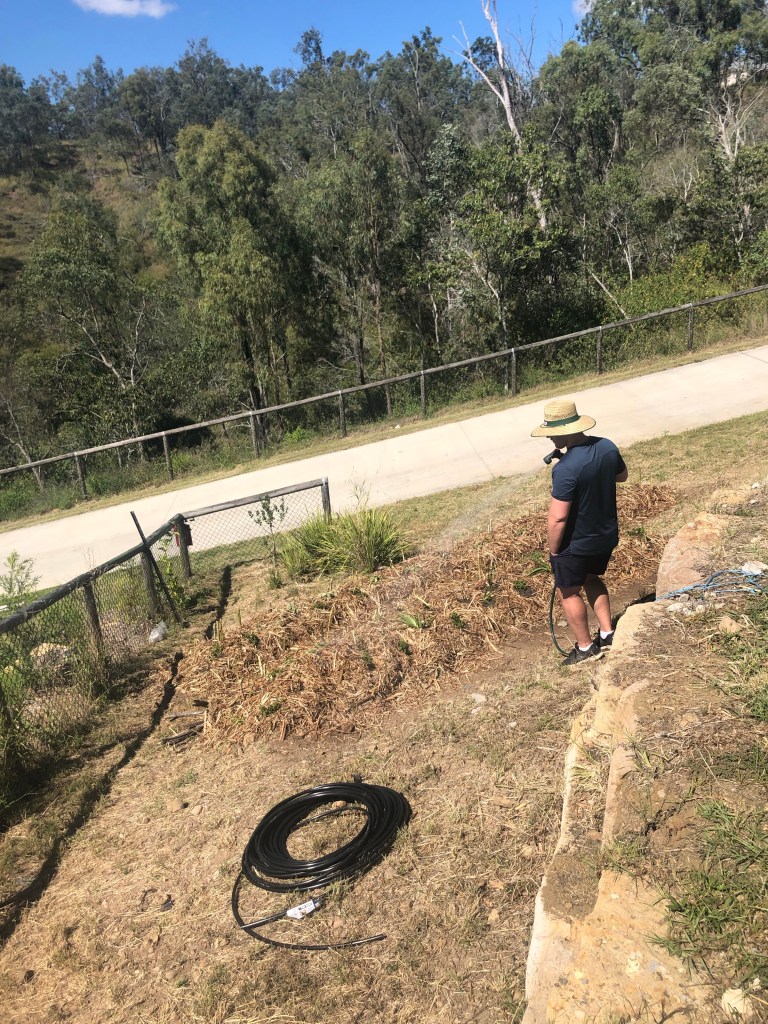
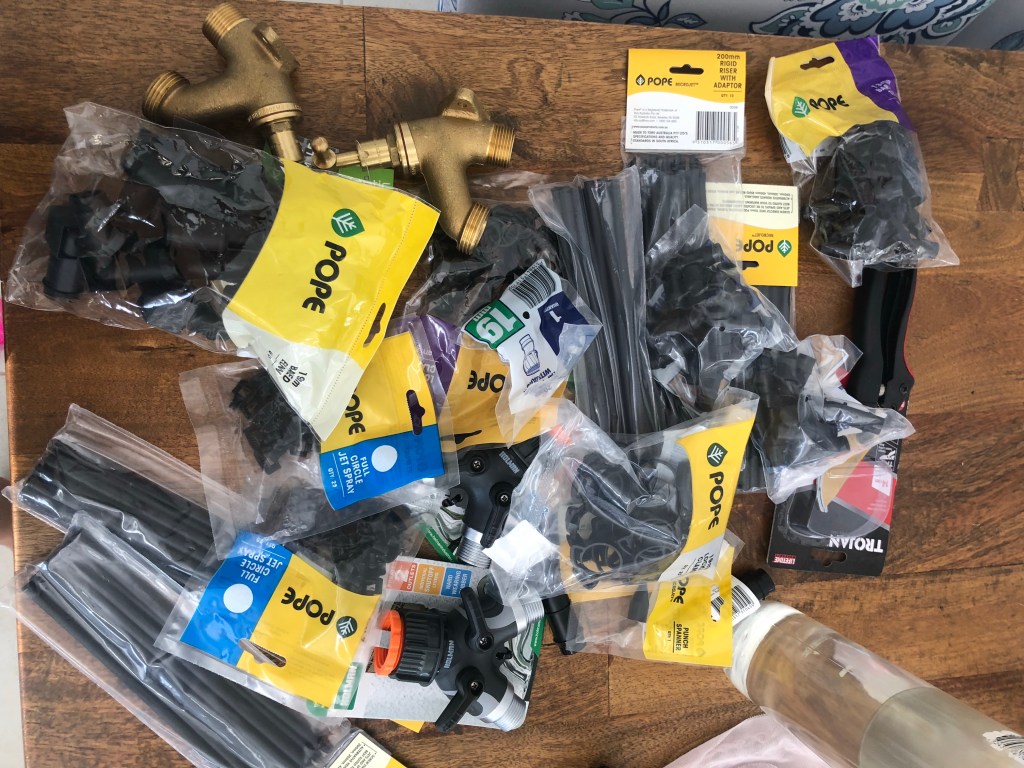
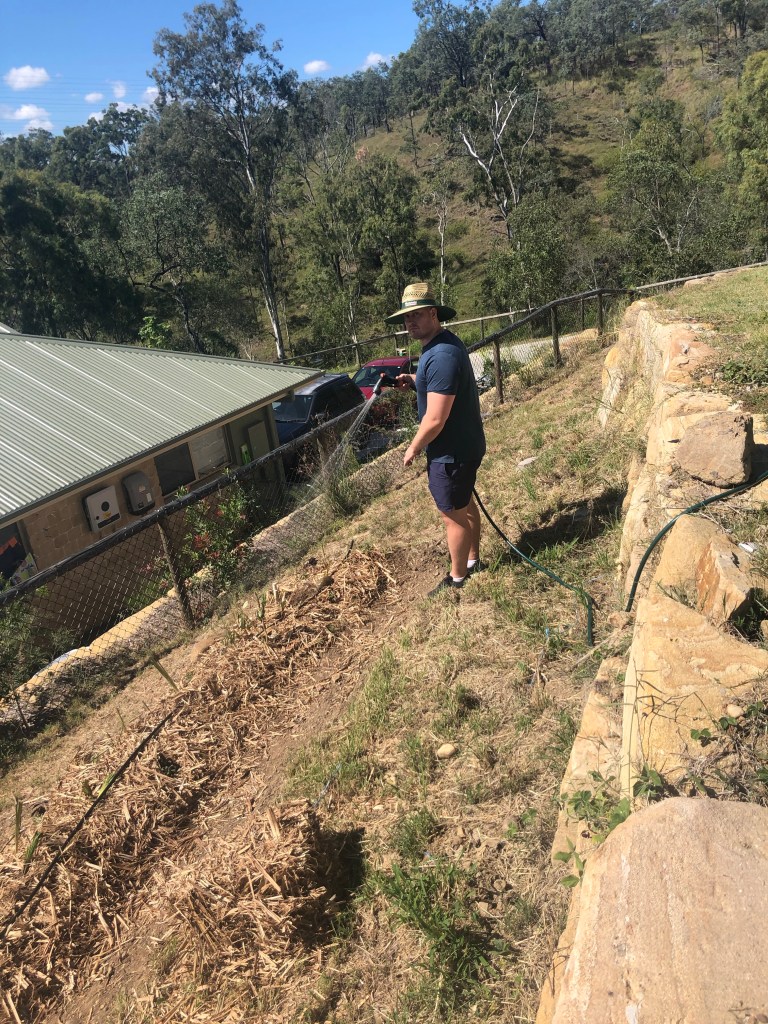
The other issue that is still driving me a little nuts is the irrigation. It’s such a new thing for me, and I’m learning A LOT about it. But the more I learn and the more questions I answer, the more questions I have and more I realise I don’t know! We have terrible flow rate here (approx. 9L/h), although I have since learnt that this doesn’t necessarily indicate poor pressure. I set up poly line down to the food forest and ran 13mm poly the length of each bed with micro sprinklers on 200mm risers. The flow rate was so poor, I barely got drips from them. Meanwhile, the connections were being blown off between the tap outlet and the food forest. Multiple trips to Bunnings, googling, frustrated phone calls, and trial and error later, I have a pressure reducer to a tap set up down in the food forest, with a hose attached. So we are hand watering, or using a sprinkler at the moment still. It’s not ideal, but I got so overwhelmed and frustrated I just put it in a too hard basket and ignored it while embracing the joy of being down there watering and observing things grow 😉 Super tough time wise with a temperamental toddler. My next task is to go into a dedicated irrigation shop and ask some questions and get some advice, and try to sort out our water flow issue. It’s still waiting patiently on my to do list, while I ignore it!
I could keep waffling, but I think I’ve covered enough of the project for now. If anyone has any questions, I’m happy to give more information where I can. I’m sure I’ll keep posting updates as they arise on the Facebook page when I remember and get time!
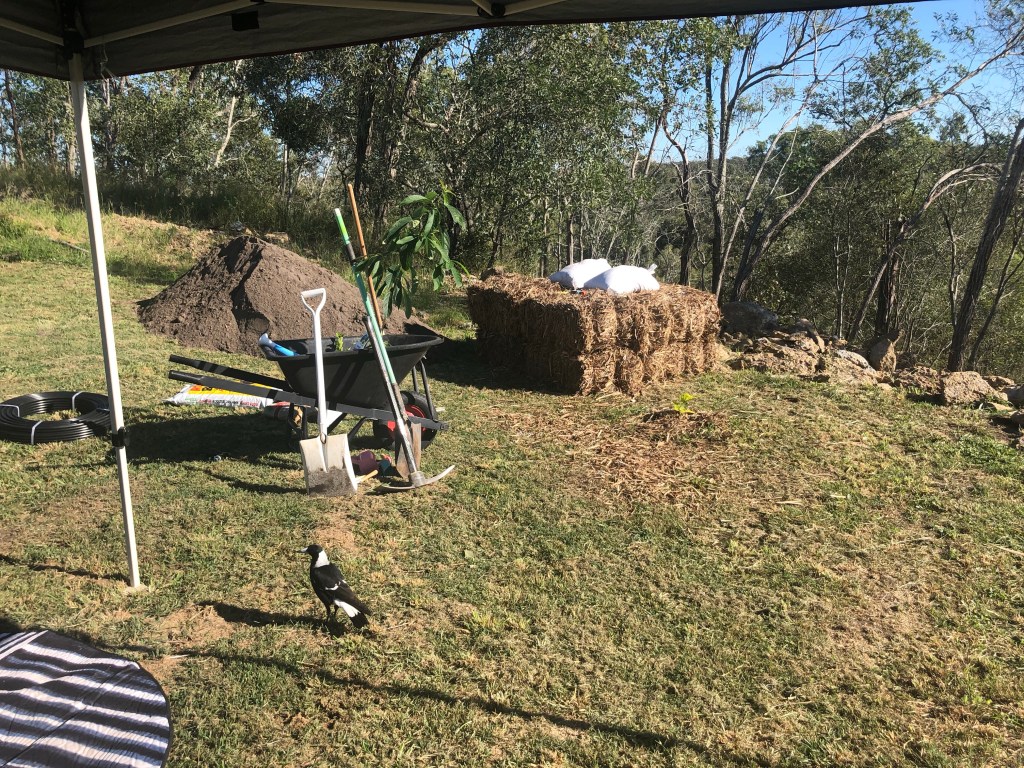
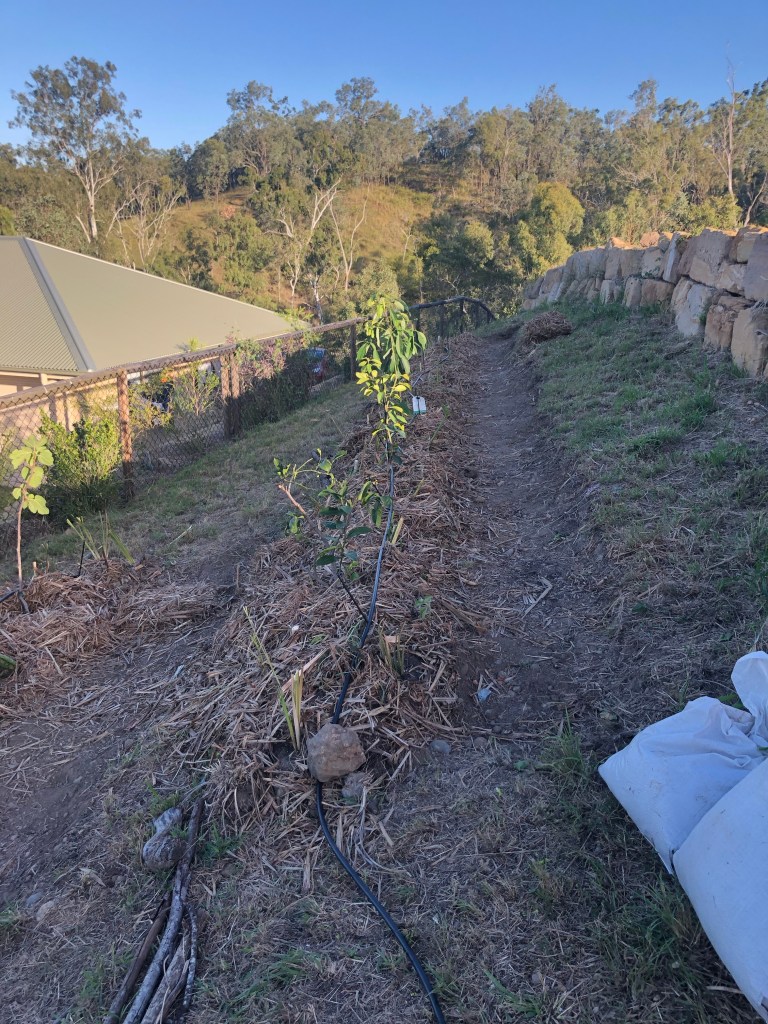
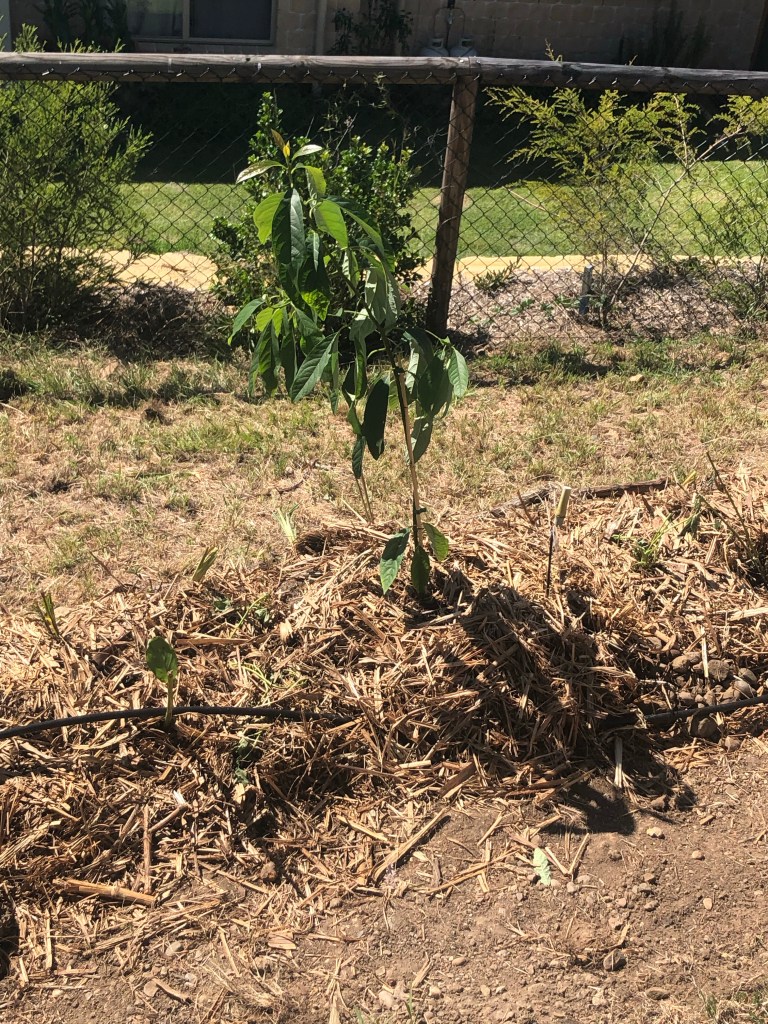
To finish off, a few pictures of where things are at now, 4 weeks after install.

Leave a reply to Bec Cancel reply